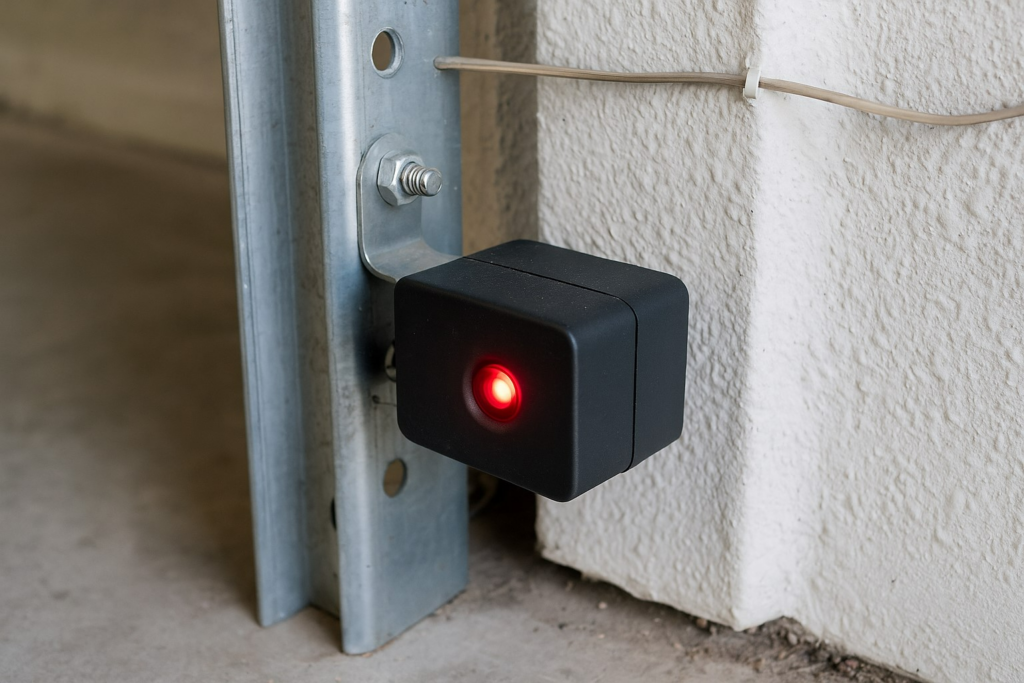
A busy morning in East Austin turned chaotic when a local family found themselves stuck at home due to a non-functioning garage door. Despite multiple attempts using the wall-mounted control and remote, the garage door refused to close. Upon further inspection, a blinking light on one of the garage door sensors revealed the problem. Misaligned sensors had stopped the door from closing, highlighting how even the smallest components in a garage door system can disrupt your entire day. This situation is more common than many homeowners realize and often strikes at the most inconvenient times.
Garage doors are more than just entryways to your home. They are integral to safety, convenience, and efficiency. According to safety reports from the United States Consumer Product Safety Commission, garage door sensors have significantly reduced accidents related to automatic doors since their mandatory implementation in 1993. These sensors have prevented thousands of injuries and incidents by ensuring that the garage door will not close when something or someone is in its path. When these sensors malfunction, it leads to inconvenient and sometimes hazardous situations that could compromise your safety and property.
If you’re a homeowner in Austin experiencing similar garage door problems, this comprehensive guide will walk you through the process of how to repair garage door sensors. You will gain expert advice, clear troubleshooting steps, and real-world tips that ensure your garage door is safe and fully operational again. Whether you are performing a quick inspection or embarking on a detailed repair, this article is designed to be your go-to reference.
What Are Garage Door Sensors and Why Are They So Important?
Garage door sensors are small yet powerful components installed a few inches from the bottom on both sides of your garage door opening. These sensors work together to maintain safety by using infrared light to detect obstacles in the path of a closing door. One sensor emits an infrared beam while the other receives it. If anything interrupts this beam, such as a child, a pet, or an object, the system sends a signal to stop or reverse the garage door.

This critical safety feature protects people, property, and the garage door itself from unnecessary damage. Without properly working sensors, the garage door opener can malfunction, which can lead to property damage, injury, or complete system failure. Sensors also help ensure energy efficiency by allowing the door to close completely and seal out the weather. In commercial and residential settings, properly functioning sensors are essential for security, as a door that will not close becomes an easy access point for intruders.
Recognizing the Signs of Sensor Issues
Understanding the warning signs of sensor failure can help you address the issue before it escalates. Common signs include:
- The garage door does not close or closes partially before reversing.
- The garage door opener flashes lights when trying to close the door.
- The sensor LED lights blink or turn off entirely.
- There is a noticeable clicking sound without door movement.
- The garage door opens but refuses to close when commanded.
These symptoms often point to either a dirty, misaligned, disconnected, or damaged sensor. Spotting these signs early gives you the chance to resolve the issue without investing in expensive parts or professional garage door service. If ignored, sensor problems can lead to more severe garage door issues, including strain on the opener, added wear on garage door springs, and even damage to the door itself.
Tools Needed to Repair Garage Door Sensors
Before starting any repairs, it is essential to gather the proper tools. Using the right equipment not only ensures a safe repair but also helps avoid damaging delicate components of your garage door system. You will need:
- A clean microfiber cloth for cleaning lenses
- A standard level tool or laser level for sensor alignment
- Phillips and flathead screwdrivers for adjusting brackets
- Electrical tape for minor wire fixes
- Zip ties or replacement mounting brackets for securing sensors
- A multimeter for electrical diagnostics to check continuity and voltage
- A flashlight for inspecting tight or dark corners of the garage
Having these tools ready will streamline your repair process and reduce the time required to complete the job. If you do not already own these tools, most can be purchased affordably at your local Austin hardware store. Keeping them handy ensures you are prepared for future maintenance or repairs.
Step-by-Step Guide to Repair Garage Door Sensors
Step 1: Inspect for Obstructions
Begin by carefully examining the space between your garage door sensors. Even small objects can block the infrared beam. Common obstructions include garden tools, trash bins, leaves, and even spider webs. Children’s toys, outdoor gear, and even garage storage bins often end up in the path of the sensor unknowingly. Removing these items might restore functionality immediately. This first step often solves the problem without the need for advanced repairs and is especially common in high-traffic garages where items are frequently moved around.
Step 2: Clean the Sensor Lenses
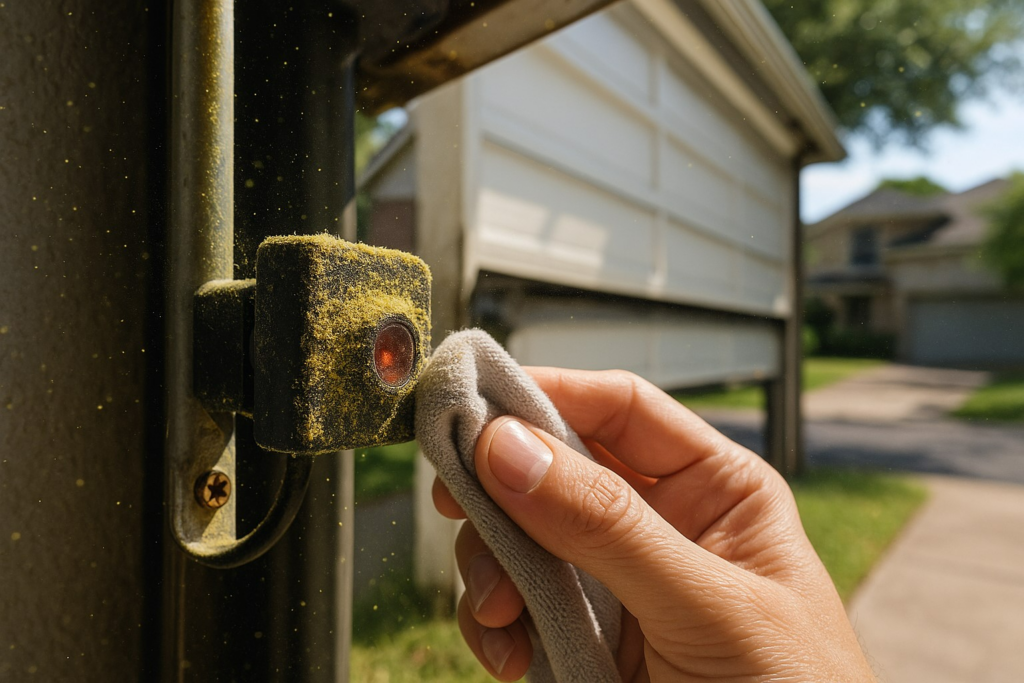
Dirty lenses are among the most frequent causes of sensor issues. Dust, pollen, and debris are common in Austin, especially during allergy season. Use a soft, lint-free cloth to gently wipe each sensor. Do not use harsh chemicals or excessive pressure, as these can damage the sensor lenses. Moisture and smudges from hands can also interfere with the infrared signal, so ensure the lenses are completely clean and dry. Once clean, test the garage door to see if the issue is resolved.
Step 3: Realign the Sensors
Misaligned sensors disrupt the infrared beam and prevent the door from closing. Check each sensor’s LED indicator light. If either light is blinking or off, alignment is likely the issue. Use the following steps to correct alignment:
- Loosen the mounting brackets just enough to adjust the sensors.
- Use a level tool to ensure both sensors are at the same height and angle.
- Gently adjust each sensor until the LED lights remain solid.
- Re-tighten the brackets while maintaining the proper alignment.
It helps to have a second person assist you by watching the lights while you make adjustments. Realignment is a common need, especially in homes where the garage door receives frequent use. Over time, vibrations or impacts can shift sensors from their optimal position.
Step 4: Examine the Wiring and Connections
Sensor wires often run along the walls and ceiling, where they are exposed to weather, rodents, or accidental damage. Look for signs of frayed cables, exposed copper, or water damage. Loose or corroded connections can interrupt the signal between the sensor and the garage door opener.
Use electrical tape to secure small cuts in the insulation. For extensive wire damage or signs of overheating, contact a licensed garage door repair technician. Rodents such as squirrels and mice have been known to chew on wires, especially in older Austin homes with open garages. Inspect connections at both the sensors and the opener terminal.
Step 5: Test the Garage Door Opener
If cleaning and realignment fail to resolve the issue, you can perform a temporary test. Press and hold the wall-mounted garage door button. If the door closes fully while holding the button, this confirms a sensor issue. However, do not use this as a permanent solution. This test bypasses the safety system and should only be used to diagnose the problem. Never rely on a bypassed sensor system for regular use, especially in homes with children or pets.
Step 6: Replace Faulty Sensors
If your garage door sensors are damaged beyond repair, replacement may be necessary. Replacement sensors are widely available online or from local garage door companies. Choose sensors compatible with your garage door opener model. Installation requires reconnecting wires, securing brackets, and testing alignment.
Take note of your current sensor brand and model before purchasing new parts. Installing compatible sensors ensures seamless integration with the rest of your garage door system. Follow the manufacturer’s instructions carefully, and double-check wiring polarity to avoid connection errors.
When to Call a Professional Garage Door Technician
While many homeowners can troubleshoot and fix minor issues, some repairs require professional intervention. You should contact a garage door service professional if:
- Sensors are physically damaged or have missing parts
- The wiring is severely frayed or disconnected
- You suspect an issue with the garage door opener
- The problem persists after multiple DIY attempts
Professionals have access to specialized tools, high-quality replacement parts, and the experience to identify deeper problems that may affect other components, such as springs, tracks, or rollers. Working with a local garage door technician in Austin ensures fast service and expert knowledge of local housing structures and climate challenges.
Preventing Future Garage Door Sensor Issues
Preventive maintenance is the most effective way to avoid garage door problems. Consider implementing the following routine practices:
Monthly Sensor Cleaning
Use a microfiber cloth to remove dust, cobwebs, and other debris. This keeps lenses clear and prevents false readings that interrupt smooth door operation. Regular cleaning is particularly important during Austin’s spring and fall when allergens and outdoor debris are most common.

Seasonal Wiring Inspections
Check the sensor wires for signs of wear every three months. Exposure to temperature fluctuations, especially during Texas summers, can affect insulation and create electrical shorts. Inspect connectors for corrosion and make sure wiring is securely fastened using zip ties or cable clamps.
Install Protective Covers
Sensor guards help prevent accidental damage from tools, bicycles, or pets. They are especially useful in garages with limited space or high activity. These guards are inexpensive and can be installed in just a few minutes, offering added protection from everyday wear and tear.
Annual Professional Tune-Ups
Schedule yearly maintenance from a trusted garage door company. A technician can examine springs, cables, tracks, and sensors to ensure your garage door system remains in peak condition. Annual checkups catch early signs of wear that can evolve into costly repairs if left unchecked. This investment can improve energy savings, safety, and the lifespan of your garage door system.
Local Weather and Garage Door Sensor Performance in Austin, TX
Austin homeowners should be aware that local climate conditions play a significant role in garage door performance. The area experiences a wide range of temperatures throughout the year, from freezing winter nights to scorching summer afternoons. High humidity, seasonal rains, and allergen-rich winds can all impact the performance of garage door sensors.
Dust and pollen during springtime can cover lenses, leading to sensor misreads. Summer humidity may create condensation on sensors or corrode exposed wiring. Additionally, sudden temperature changes cause materials to expand and contract, which can gradually misalign sensors or damage electrical components. Homeowners should adjust their maintenance routines according to the season and climate trends to maintain consistent sensor performance year-round.
Safety Tips When Working With Garage Door Sensors
Garage doors are heavy, powerful systems that require caution when performing maintenance or repairs. Safety should always be your top priority, especially when working around moving parts, high-tension components like garage door springs, or electrical wiring. Keep the following tips in mind:
- Unplug the garage door opener before beginning any repair to prevent accidental activation.
- Do not attempt to adjust or repair garage door springs or cables unless you have been professionally trained. These parts are under high tension and can cause serious injury.
- Use proper tools and wear safety gear, including gloves and protective eyewear.
- Ensure the ladder is stable and positioned on level ground when accessing sensors or wiring near the ceiling.
- Keep pets and children away from the garage while performing maintenance to avoid distractions or accidents.
If you ever feel uncertain about a step in the process, it is always safer to contact a trained garage door repair technician in your area.
Why Functioning Sensors Are a Must-Have
Garage door sensors are a non-negotiable component of any modern garage door system. Since 1993, federal law has required that all automatic residential garage doors include functioning safety sensors. These devices are not optional; they are a necessary part of your home’s safety infrastructure.
When sensors malfunction, the risks go beyond inconvenience. Your garage door may fail to close completely, exposing your home to theft or weather damage. Worse, a non-functioning sensor can fail to detect an obstruction, resulting in damage to your vehicle, personal property, or even injury to a person or pet.
Additionally, a garage door system that lacks operational safety sensors may violate local building codes or fail inspection during real estate transactions. Functioning sensors protect your investment and provide peace of mind, ensuring your garage door system operates safely and reliably every time you press the opener.
How Can Darby Garage Doors, Inc. Help You?
Located right here in3505 Austin on Darby St,TX78721 Darby Garage Doors, Inc. is your trusted partner for all garage door repair needs. We specialize in diagnosing and repairing garage door sensors, restoring full functionality, and ensuring the highest standards of safety for your home or commercial property.
Our licensed technicians are trained in the latest garage door technologies and equipped with state-of-the-art tools to address any issue, from faulty sensors to complex opener failures. We serve neighborhoods throughout Austin and surrounding communities, offering local expertise and dependable solutions.
Call us today at (512) 881-8331 for a free quote or to schedule your tune-up service. Our team offers:
- Fast and reliable service appointments with on-time arrival
- Emergency garage door repairs available 24/7
- High-quality replacement parts for garage door sensors, springs, rollers, and cables
- Installation services for new garage doors and openers
- Comprehensive garage door maintenance plans to prevent future issues
Let our top-tier team bring your garage back to full working order. We are committed to customer satisfaction, safety, and long-term reliability.
Final Thoughts
Garage door sensors may be small in size, but their role in maintaining a functional, safe, and secure garage door system is monumental. As this guide has shown, many common sensor problems can be identified and resolved by homeowners with a bit of patience, the right tools, and an understanding of how the system works.
From removing obstructions and cleaning lenses to aligning sensors and inspecting wiring, these repairs help extend the lifespan of your garage door system. Preventive maintenance plays a crucial role in keeping your garage door operating smoothly. Regular inspections, seasonal adjustments, and professional tune-ups can prevent small problems from turning into expensive repairs.
However, there are times when professional help is not just helpful, but necessary. When the issue goes beyond your comfort level or involves critical components like garage door springs or opener electronics, calling a reputable garage door service provider is the best path forward.
At Darby Garage Doors, Inc., we are proud to serve the Austin community with top-notch garage door services that prioritize safety, performance, and customer satisfaction. Whether you are repairing sensors, replacing a broken spring, or installing a new garage door, we are here to help you every step of the way.
Take action today to ensure your garage door is operating at its best. Contact our team for expert advice, professional service, and a commitment to excellence you can count on.
Frequently Asked Questions (FAQs)
1. How long do garage door sensors typically last?
Most garage door sensors last between 8 to 12 years, depending on usage, maintenance, and exposure to environmental factors like moisture or direct sunlight. Regular cleaning and occasional alignment can extend their lifespan.
2. Can I upgrade my old garage door sensors to smart sensors?
Yes, many modern garage door systems allow sensor upgrades to include smart features such as app monitoring and automatic alerts. Just make sure the new sensors are compatible with your garage door opener model.
3. Are there wireless garage door sensors available?
While most traditional sensors are wired, some newer systems offer wireless sensor options for easier installation. These often require battery changes and may need stronger signal transmission to work reliably.
4. What happens if I disconnect my garage door sensors permanently?
Disabling or removing garage door sensors is not recommended and can make your system non-compliant with safety regulations. It also increases the risk of injury or property damage, especially in households with children or pets.

